Blog
Errors & Solutions
General
Header & Footer
Sidebar
Theme Option
WooCommerce
Update Site Identity
One of the most important thing of your websites header is Logo and Site Identity. That’s are the first way of your websites identification. All pages of your websites first element is Logo and Site Identity, so you have to aware of you brand name, logo and tagline.
- Logo
- Retina Logo
- Logo for mobile devices
- Site Title
- Site Tagline
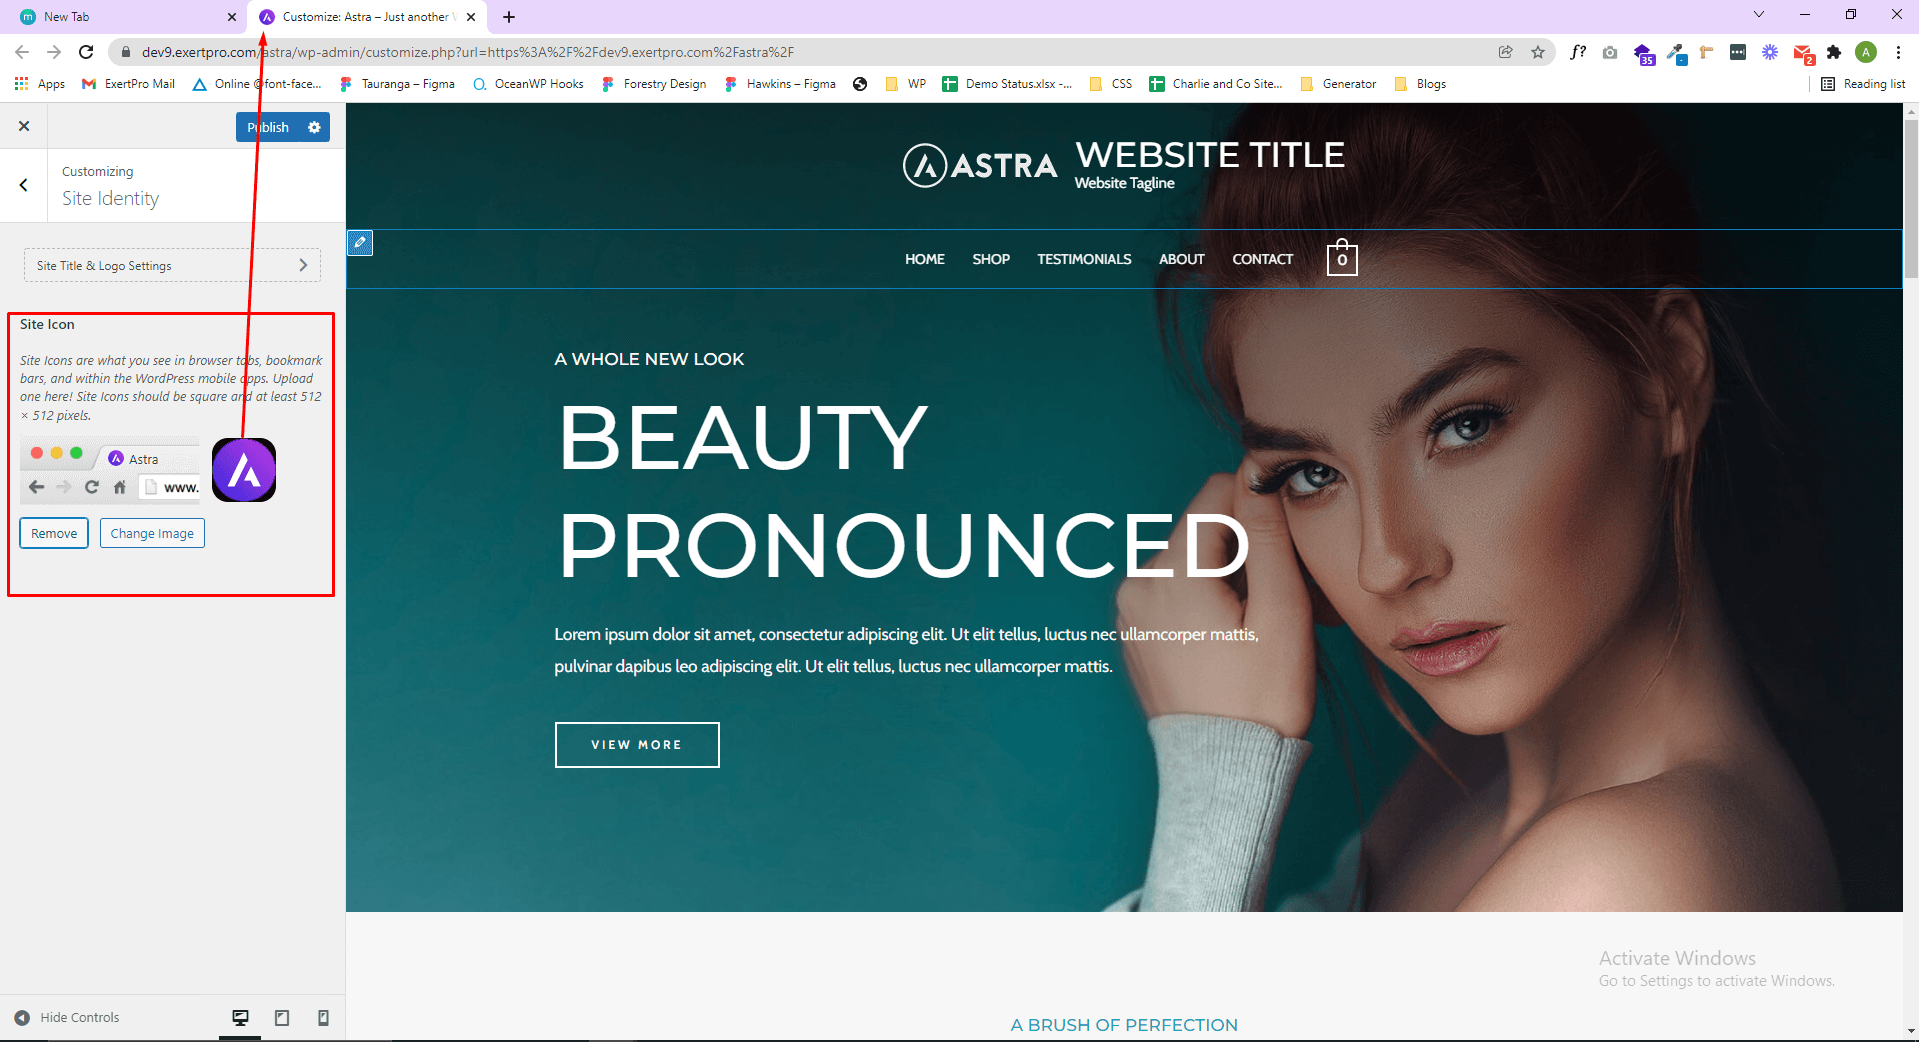
- Site Icon (Favicon)
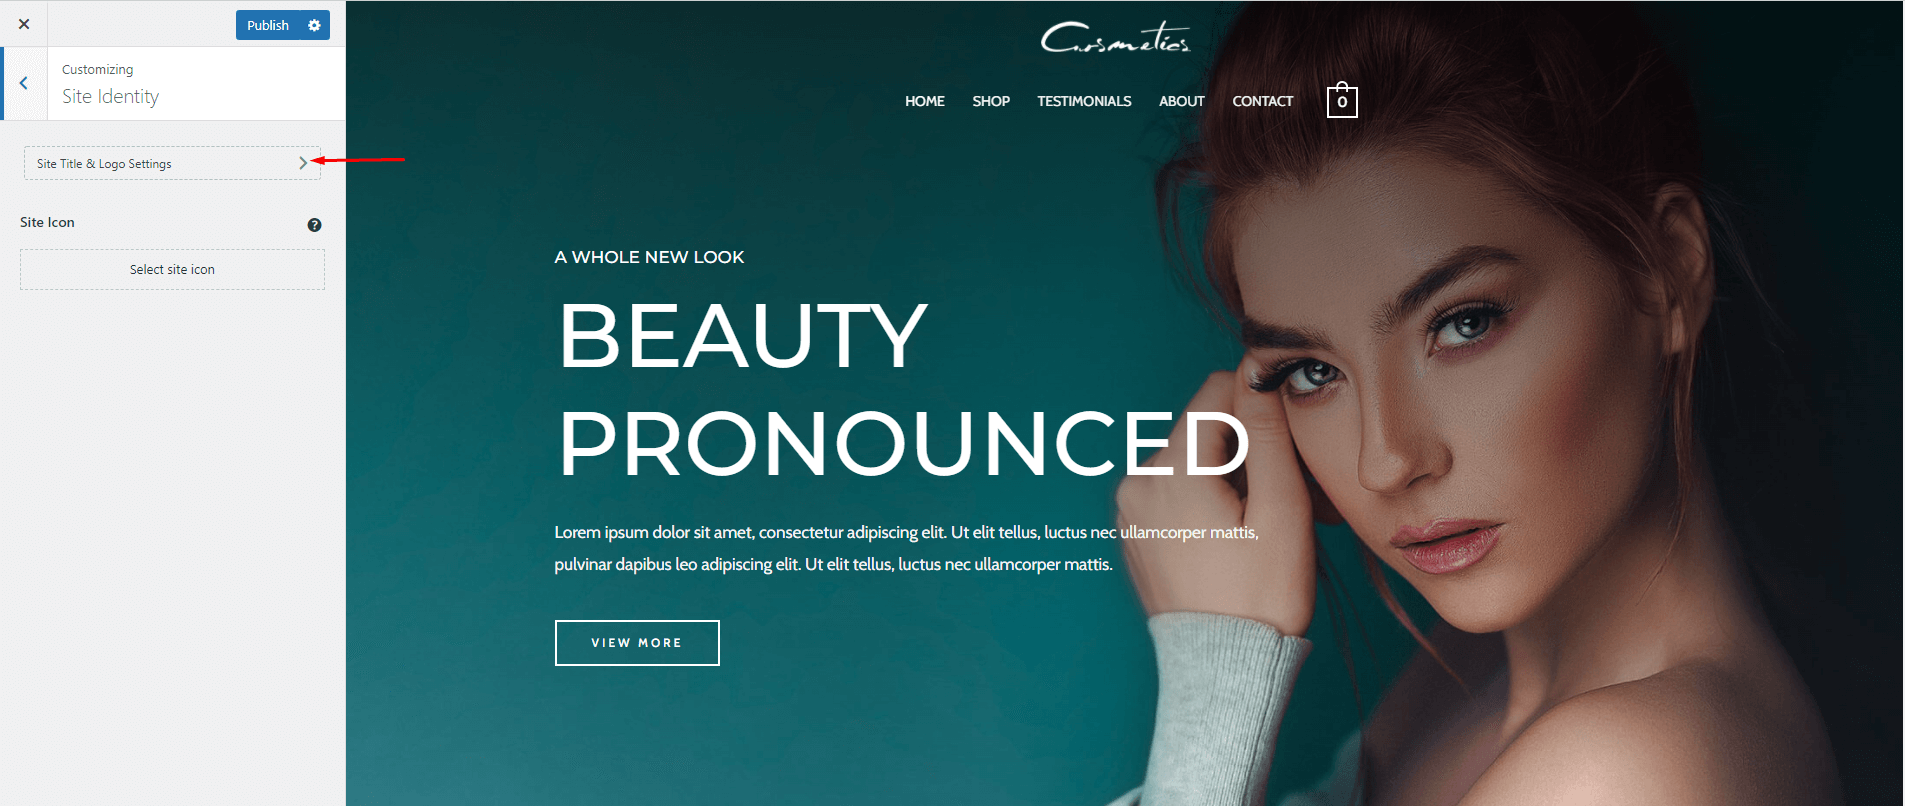
To setup your Logo and Site Identity, navigate to Appearance > Customizer > Site Identity > Site Title & Logo Settings. In the left side, you will find all options and properties for Logo and Site Title.
Logo
From the General Tab you can set your logo, lets see where and how to do this:
Step 1 – Click on the Logo area and upload a file or select a logo from your Media Library. You can add logos as JPG, PNG, and SVG.
Step 2 – Though this step is optional, enabling a Different Logo For Retina Devices will ensure your logos look great on devices with retina screens. It’s advisable to upload at least two times larger so your logos won’t be blurred on high-definition screens. You can find out more about the retina logo in this article. If you decide not to use this option, your website will show your primary logo (from Step 1) on retina screens too.
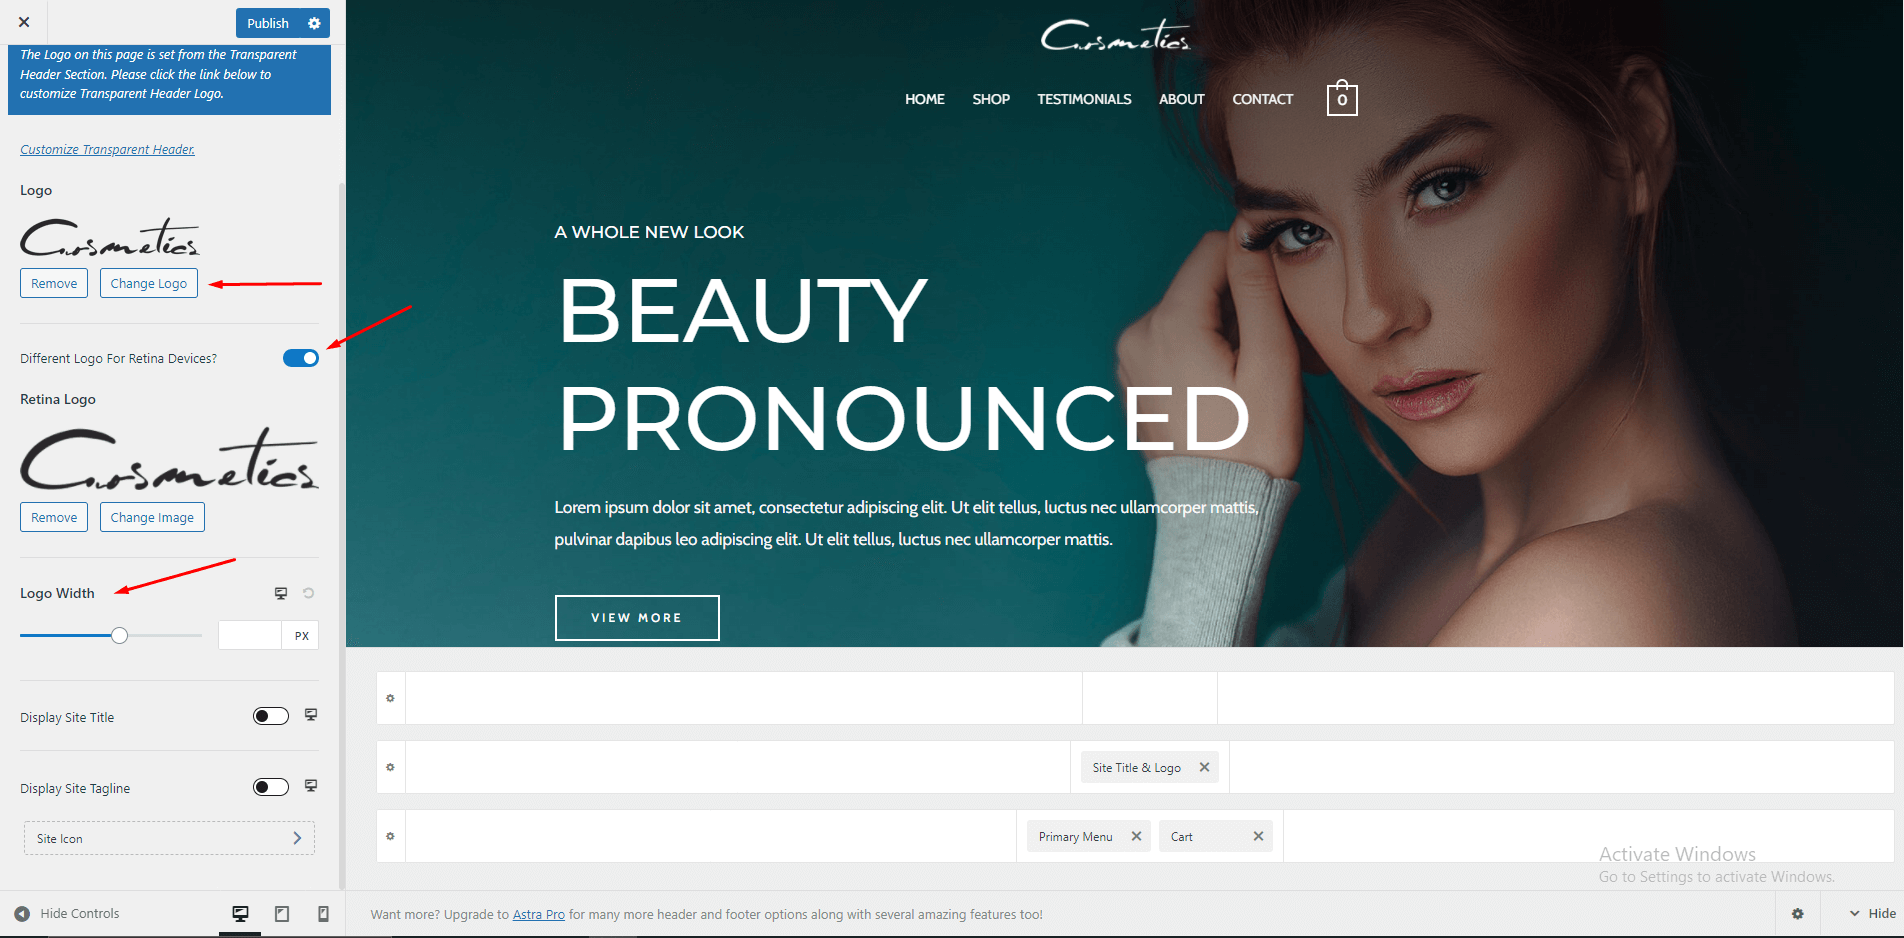
Step 3 – Once your logo is added, you can choose the Logo Width. This will set the size of your logo, as the height will be automatically calculated based on the width. You can also set different logo widths for desktop, tablet, and mobile by clicking the responsive editing icon to switch between these screens.

Step 4 – If your design requires a different logo on mobile devices, you can switch to mobile editing and enable Different Logo For Mobile Devices to add a different logo only for mobile devices. Keep in mind that the mobile logo you set will be used for both tablets and mobile phones.
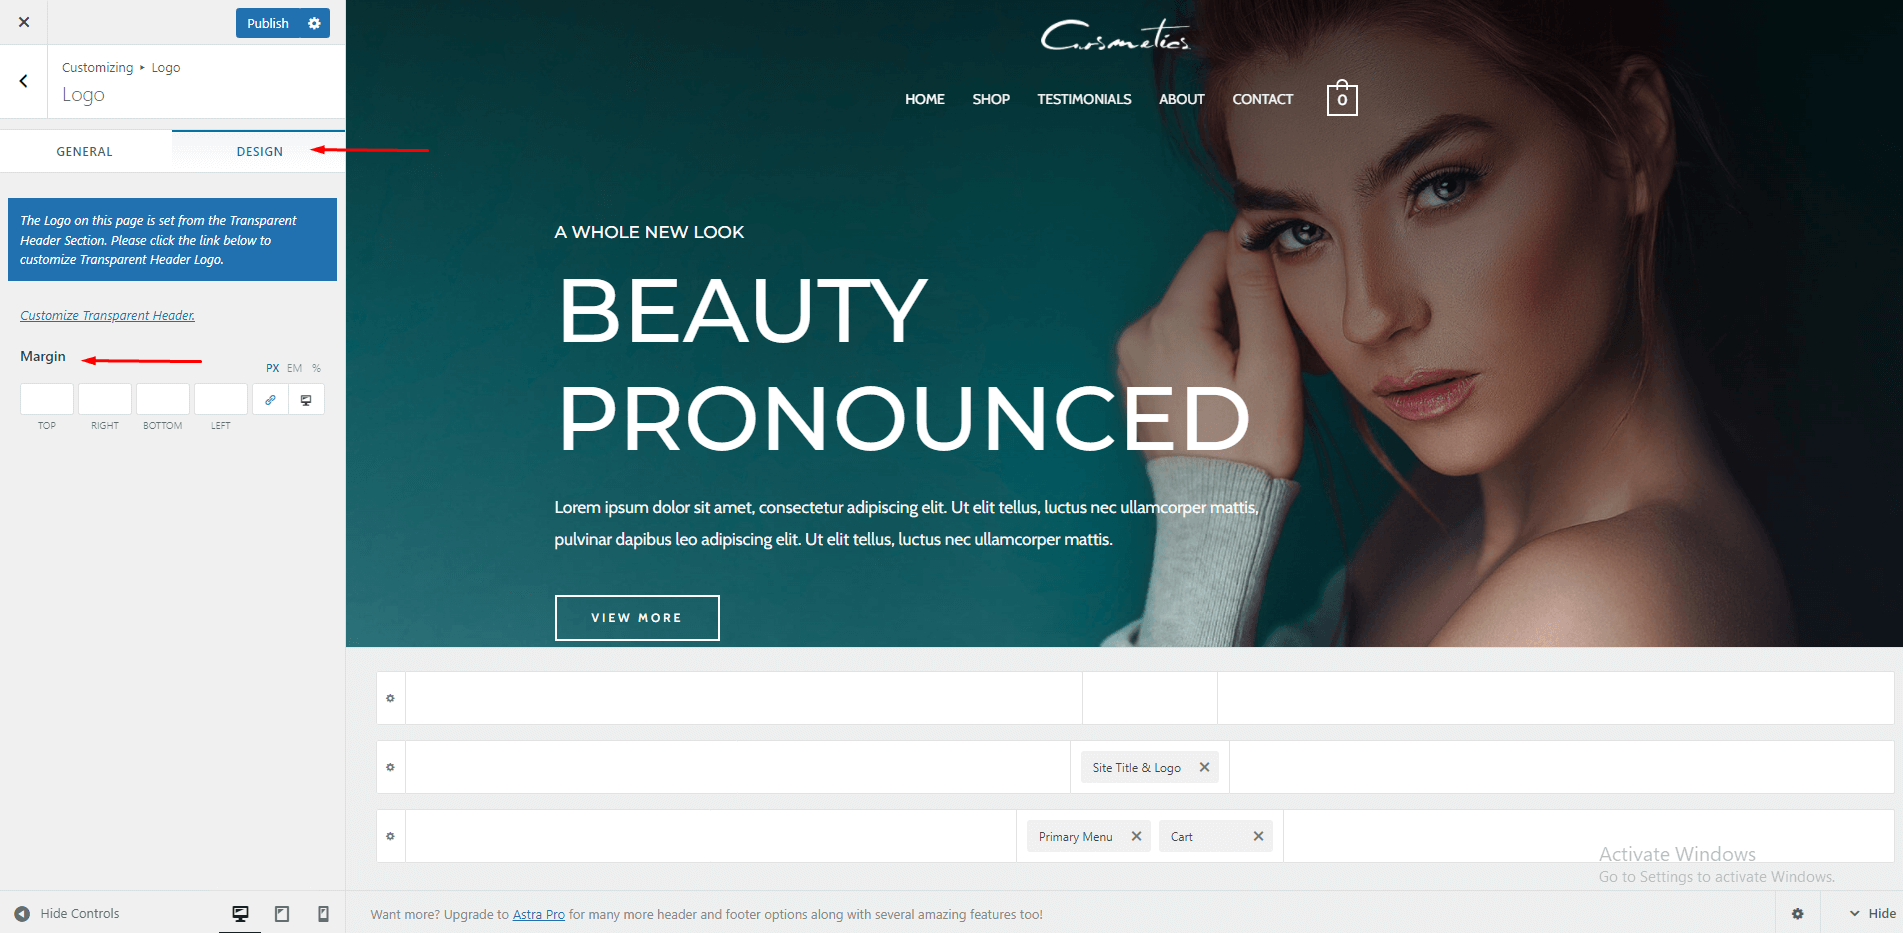
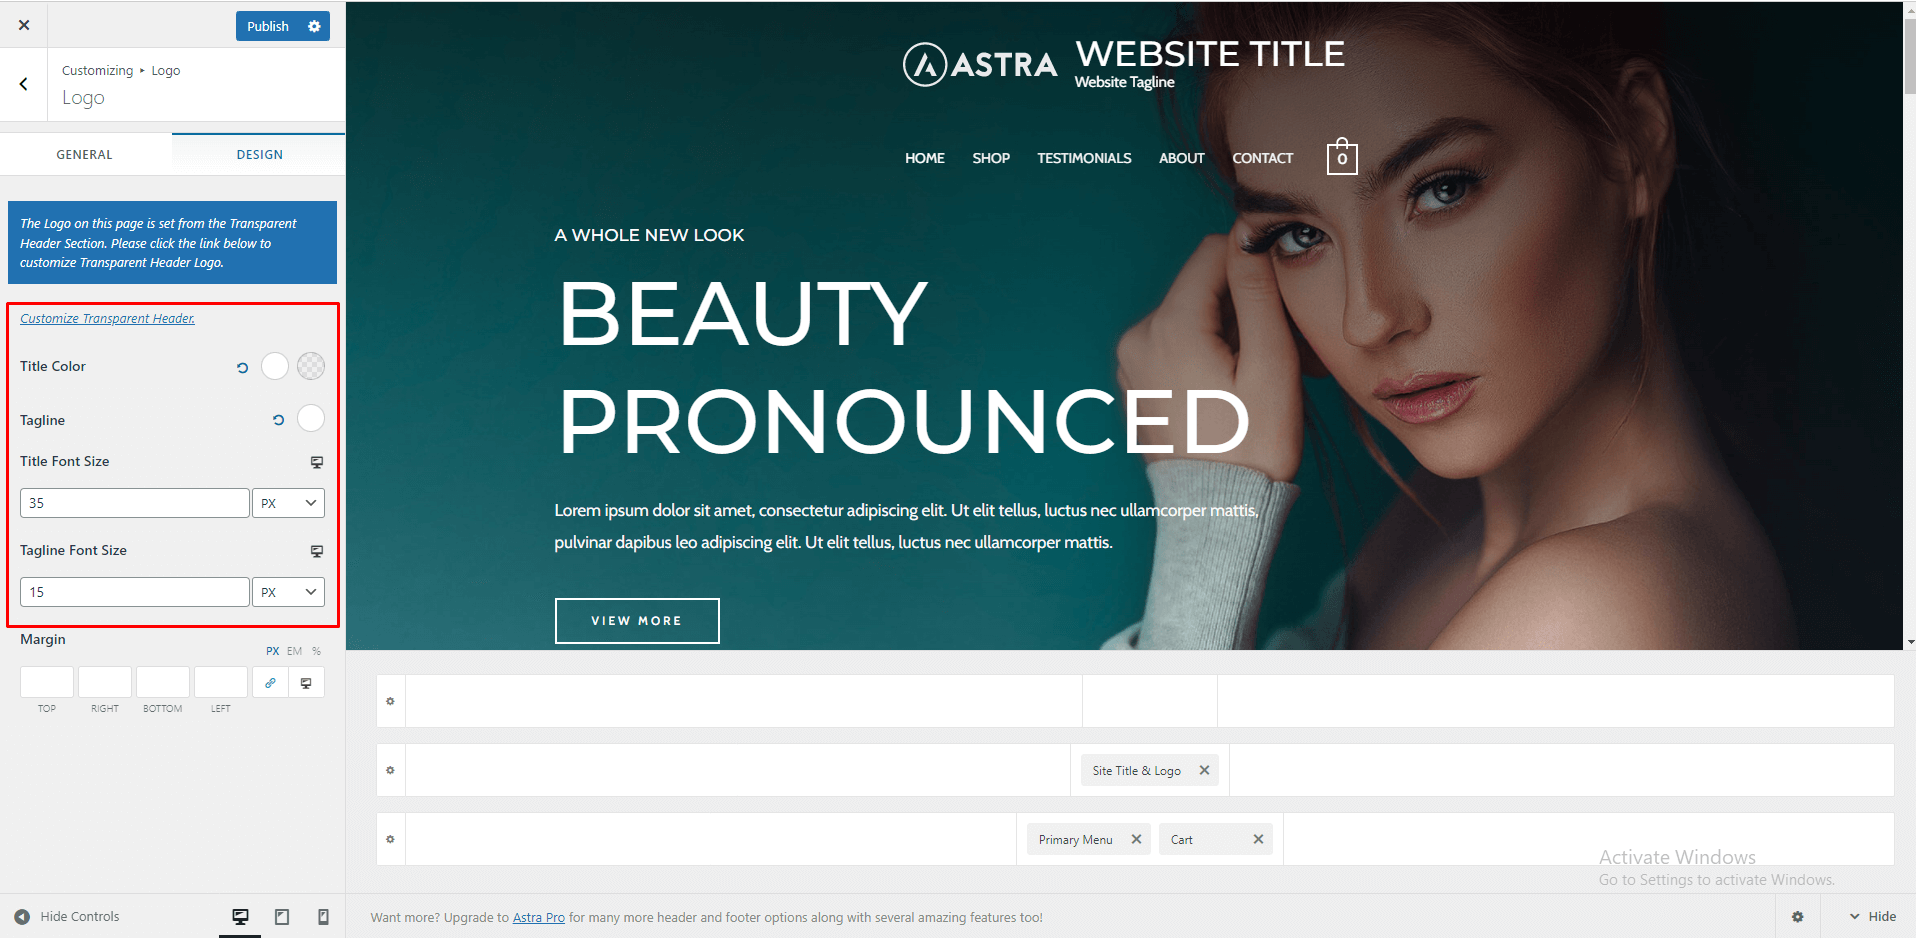
Step 5 – You can switch to the Design tab of the element and set Logo margins.
Site Title and Tagline
Site name generally your business name, and the tagline is basically slogan, a short description of your business.
Step 1 – You can make these visible beneath your logo by enabling their respective options within the General tab of the Site Identity & Logo element. You can enable these separately for desktop, tablet, and mobile.
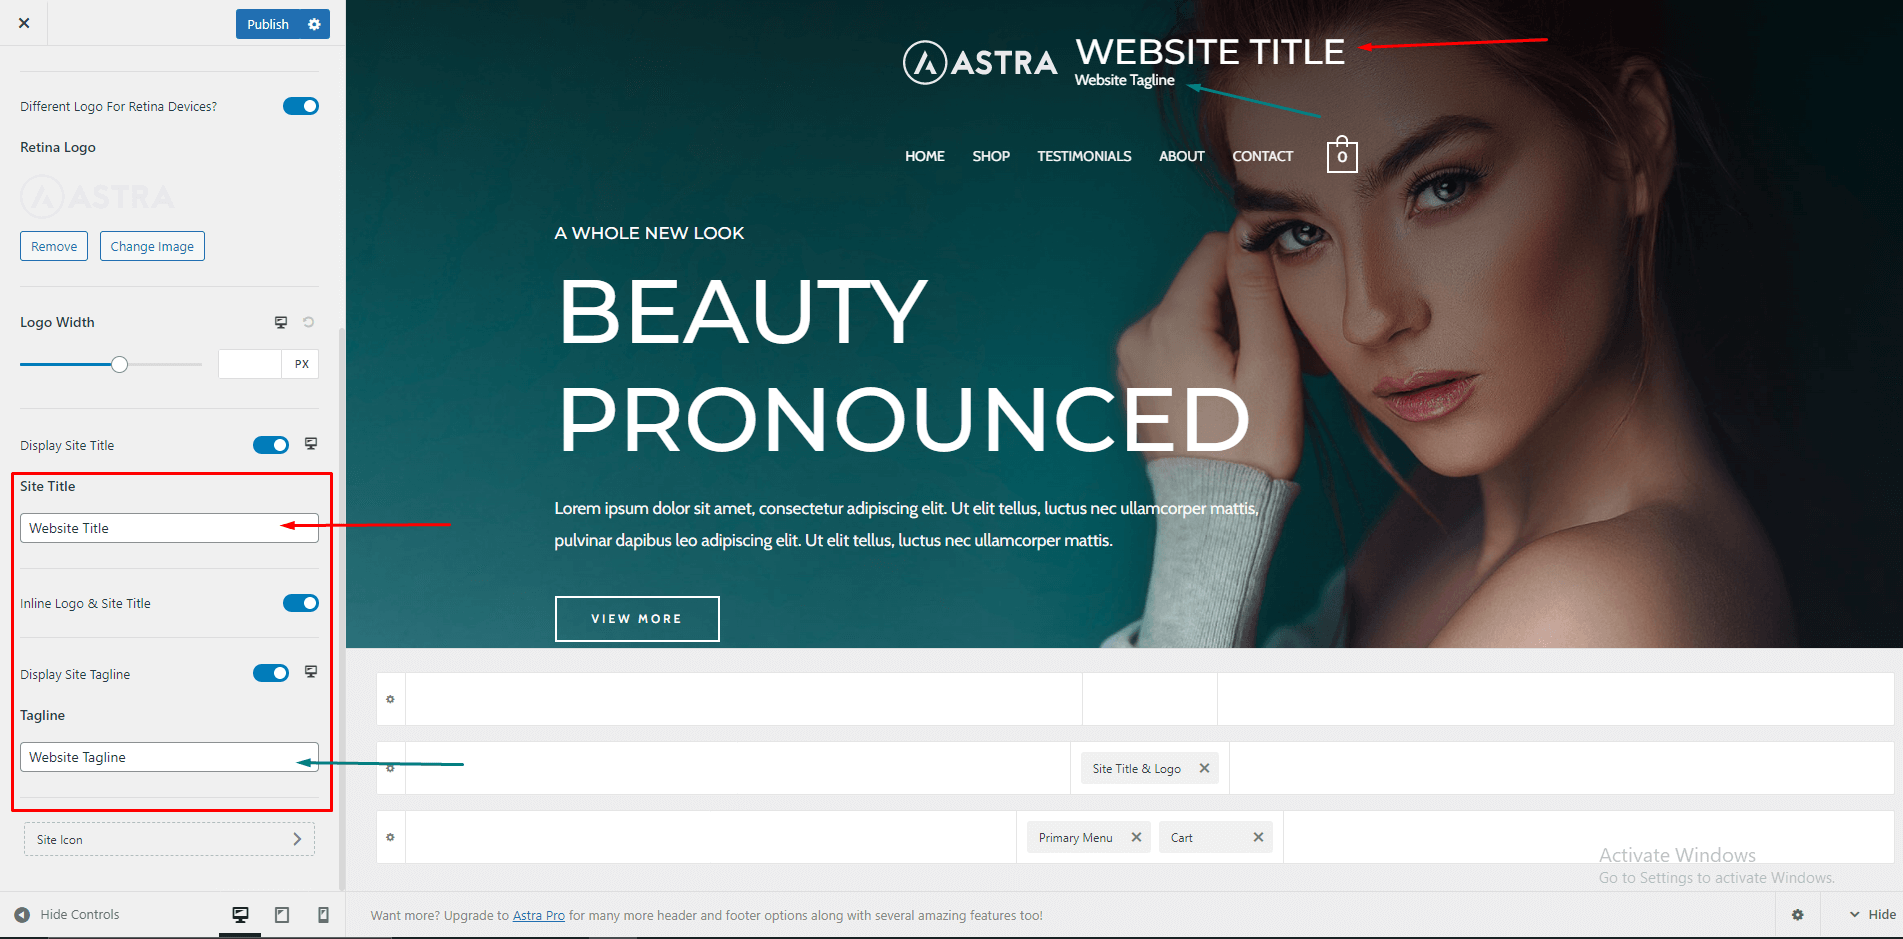
Step 2 – Usually, site title and tagline are added when creating a new website at Dashboard > Settings > General. If you want to modify these, you can do it directly in the element settings without leaving your Customizer.
Step 3 – Also, if you would like to position your site title and tagline on the right side of your Logo, you just need to enable the Inline Logo & Site Title option.
Step 4 – If you switch to the Design tab of the element, you will find the options for changing the Color and Font Size of the Site Title and Tagline.
Site Icon (Favicon)
Site icon or favicon is for browser tab. When you visit your site it will be found in browser tabs left side, beside of site title. Normal size of this icon image is 32×32, 50×50, 64×64.